
DIY Lantern Tutorial


Hello Folks! This tutorial I have been waiting to do forever- Literally 6 years I have wanted these lanterns in my kitchen. Actually I should have planned them into the design of the house.
Shoulda- woulda- coulda!
Here are some pics of inspiration for my fixtures.
Restoration Hardware's Weston Square Pendant
 |
| Weston Square Fixture |
 |
| Link to designer site. |
Here is a pic of the lighting fixture I had in my kitchen before.
 |
| My Kitchen fixture before- sorry, a little grainy. |
Yes, it is a pretty fixure, but the problem with it is that it blocks the view of my black custom cabinetry, and does not give the kitchen the feel I am after. A little fancier. So, I took down the old chandelier,

...and covered the hole with a temporary plastic cover to make the hole disappear.
 |
| See cover in the middle? It helps hide previous electrical hole. |
 |
| See???Compare at $60!!!! |
Darn- I don't have a pic of them in the store- but they looked similar to this:


Then, I drilled a hole in the top of the lantern.


I saw the potential right away! Also, these lanterns are made to withstand heat- there were instructions for putting real candle flames inside, so I figured using them with lightbulbs would be fine as well.
Now, I had the lanterns but needed the electrical component, so I headed down (up) to the Habitat for Humanity Restore.
I picked up these little beauties (not.) They were 10 dollars each, but then there was a 40 % discount on all lighting for the month of February! 6 dollars each, Bam!
Now, I had the lanterns but needed the electrical component, so I headed down (up) to the Habitat for Humanity Restore.
I picked up these little beauties (not.) They were 10 dollars each, but then there was a 40 % discount on all lighting for the month of February! 6 dollars each, Bam!
 |
| I only wanted the lighting inside of these, and the chain...not the glass. |
So I started taking them apart.

Till I was left with this:

Now to the spray booth:
Disclaimer---for the first lantern I turned into a chandelier, I removed the bulbs and white candle sleeves and sprayed the chain, then added it to the chandelier. The second time around, I did opposite, I added the lighting component to the lantern, then sprayed. The second way worked MUCH better. These are the instructions for the second way.
* Please excuse my picture quality, this was tough taking pics at night after the kids were asleep, and building and taking pics at the same time.
So, I first removed all of the glass from the lantern and labeled them with a sharpie so later I could insert them back into the frame. I labeled them L for Left, B for Back, R for Right and D for Door.

Then, I drilled a hole in the top of the lantern.

It had to be big enough for the wires to pass through. check!


Then I added the chain. And weaved the wires through every other link. I decided for stability purposes I would hook a link around the top of the lantern handle. This helped to secure and stabilize the fixture.
Then, I spray painted all of the chain and wire and pieces with black satin spray paint.
Now time to hang the fixture. I turned off the electrical current at the electrical box outside.
* Note- I waited to add the glass back to the fixture so it would not be so heavy to hold and install.
I cut the chains to ten links each, this gave a good hanging height and was a way for me to ensure each fixture was the same length. I do not have pics of me doing the electrical, for obvious reasons. Essentially you join the neutral wire with the neutral wire... add nut to join, hot wire with the hot wire...add nut to join, and ground wire (green) with the ground wire and attach to ground screw.
Here is a good illustration of how to hang a chandelier.

I did the same thing except I added a plate in-between the fixture base and the ceiling in order to cover up the can light hole that used to be there.

Next, I added the glass to the lantern. First I windex-ed them, then added to the fixture.


Next, while the fixtures were hanging I used my spray paint to touch up any brass peeking out or scratches from the chain on the handle. In order for the spray to not get all over the glass or my kitchen I put a piece of paper towel behind where I was spraying to prevent any miss-spray. Oh, and don't forget to take off the "made in ______" stickers on the underside of the fixture.
Then, I turned back on the electrical and- Yea! They worked!


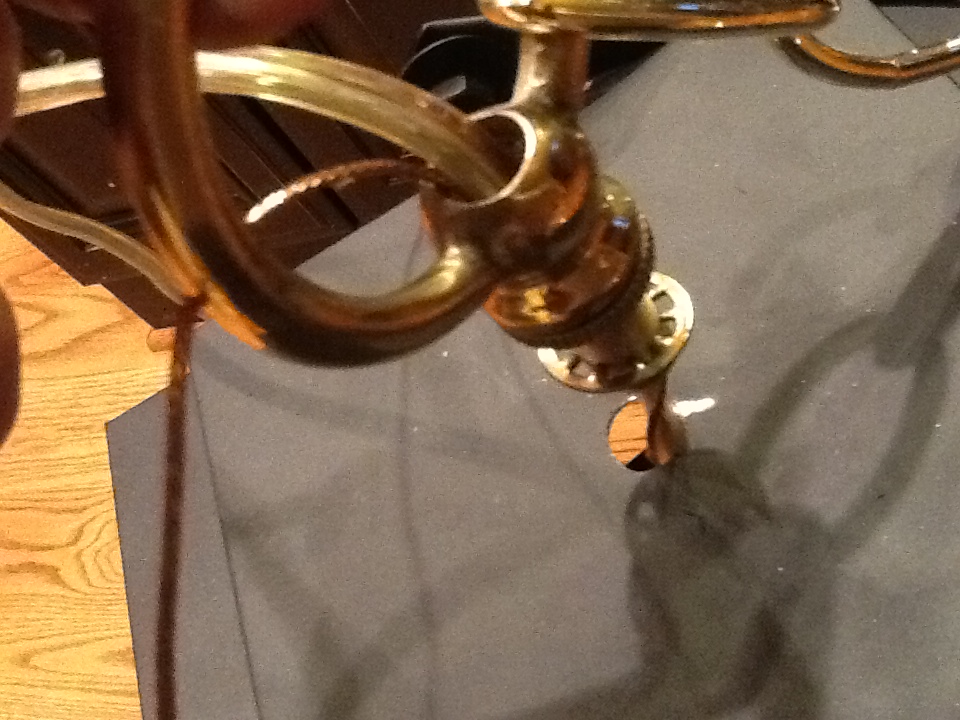
Next, I threaded the wires through the top and secured with fixture loop, nipple and lock washer. Also, I decided to add a canopy (from the old brass fixture) in the opening space to help hide all of the wire inside the lantern. You can see this a few pics down.
Then I added the chain. And weaved the wires through every other link. I decided for stability purposes I would hook a link around the top of the lantern handle. This helped to secure and stabilize the fixture.
 |
| Brass canopy in between to hide wire. |
Then, I spray painted all of the chain and wire and pieces with black satin spray paint.
Now time to hang the fixture. I turned off the electrical current at the electrical box outside.
* Note- I waited to add the glass back to the fixture so it would not be so heavy to hold and install.
I cut the chains to ten links each, this gave a good hanging height and was a way for me to ensure each fixture was the same length. I do not have pics of me doing the electrical, for obvious reasons. Essentially you join the neutral wire with the neutral wire... add nut to join, hot wire with the hot wire...add nut to join, and ground wire (green) with the ground wire and attach to ground screw.
Here is a good illustration of how to hang a chandelier.
I did the same thing except I added a plate in-between the fixture base and the ceiling in order to cover up the can light hole that used to be there.

Next, I added the glass to the lantern. First I windex-ed them, then added to the fixture.


Next, while the fixtures were hanging I used my spray paint to touch up any brass peeking out or scratches from the chain on the handle. In order for the spray to not get all over the glass or my kitchen I put a piece of paper towel behind where I was spraying to prevent any miss-spray. Oh, and don't forget to take off the "made in ______" stickers on the underside of the fixture.
Then, I turned back on the electrical and- Yea! They worked!

I am telling you my pictures do not do these fixtures justice. They really dress up my kitchen and make the whole area feel more elegant!
 |
| View from below. |

* These were really hard to photograph. Hope you love my tutorial.
Drop me a line.
Like us on Facebook!
Thanks, Kristen
These are awesome!
ReplyDeleteFantastic! Thanks for the inspiration, I've been wanting to change to hanging lanterns too!
ReplyDeleteJeannine @ The Concrete Cottage
Wow! Fantastic idea. I think I might borrow this idea for my front hall. I'm looking for a carriage style light fixture and I can't find anything in my area and everything I see online is unbelievably expensive. This just may be the solution to my problem. Thanks for sharing!!! Sharon B.
ReplyDeleteGorgeous!
ReplyDeleteYou are so creative! These are beautiful! And love Love LOVE your kitchen!
ReplyDelete-Audrey (mops) ;)
This is nice. Your projects are nice. But, if you really want some inspiration on how to make something out of nothing you need to read the blog called: "The Chartreuse Life" from Chartreuse and Company. That lady really knows how to post blogs that are fun, inventive, and not just tutorial. Classy taste and classy blog.
ReplyDeleteYes, thanks for the tip! I was actually at the barn over the weekend getting inspired.
DeleteHi Love your blog. I just bought the lantern from TJ Maxx and I also found a lamp at Habitat. However my question is how do you get the glass out of the new lantern...... mine had little clips and I tried bending them but the glass would not budge. What am I doing wrong. very frustrating. I was scared if I hit it too hard it would break the glass.
ReplyDeleteHi! To remove the glass I just bent the clips back and wiggled them out slowly. I have made about 6 of these since I posted this. Most of the lanterns will have clips and a little glide/guide piece on the bottom of each panel of each glass piece of the lantern- you need to wiggle them out gently. Knock on wood I have never broken a glass piece yet. It is tricky!
DeleteGreat idea , I'm remodeling my sister in laws house . The theme is country living . I can utilize the old lights that were in the hallway . Thank you kindly , Tavis.
ReplyDeleteWow! Great job! I am thinking of hanging similar lanterns in my new kitchen. I may purchase them. Your work, though, gives me inspiration to turn a crystal chandelier, I already have, into a hanging light for my new DR. Thinking of spraying it silver or gray, and placing a silver mesh drum shade around it. I won't need to do the hard work with finding and installing the electrical components, since we have that. However, if the cost is too much for kitchen lanterns, I now know how I can save money and have what I want there, too! Sue
ReplyDeleteThanks for the tutorial. We are in the process of building a house and light fixtures are one of the things we are looking for now. I like lantern style so I might just give this a try.
ReplyDeleteGorgeous. Love our local Habit at Restore, too. In fact, I have 2 of them w/in 20 miles of my home. Lucky me!
ReplyDeleteGorgeous. Love our local Habit at Restore, too. In fact, I have 2 of them w/in 20 miles of my home. Lucky me!
ReplyDeleteI just found your post. Awesome details and pics. Heading to the thrift store...
ReplyDeletenice job. my good friend is the manager of the habitat store in ottawa. so thank you for promoting them,. you are a great crafter, they are awesome. and i love your company name,.... i am an ex manager of Michaels the super craft store, you have re inspired me,.... thank you wendy b
ReplyDeleteI was diagnosed as HEPATITIS B carrier in 2013 with fibrosis of the
ReplyDeleteliver already present. I started on antiviral medications which
reduced the viral load initially. After a couple of years the virus
became resistant. I started on HEPATITIS B Herbal treatment from
ULTIMATE LIFE CLINIC (www.ultimatelifeclinic.com) in March, 2020. Their
treatment totally reversed the virus. I did another blood test after
the 6 months long treatment and tested negative to the virus. Amazing
treatment! This treatment is a breakthrough for all HBV carriers.
whatsapp goruntulu show
ReplyDeleteshow
OJJV2E