
Canvas Dropcloth Cushion & Custom Pillows

It has been a while since I have made these little beauties as part of my Mudroom Makeover. My mudroom has become the most practical and useful room in my house, thanks to the homework island I built, and there re plenty of areas to put shoes on and take them off, see my reclaimed bench tutorial. However, I am just now getting around to do the tutorial for the cushion and pillows. Not sure why...they were painfully simple to make and the sewing was simple too. After seeing pillows around shops in town called "Flour sack pillows" I decided, I can make that! I wanted the look of the fancy linen pillowcases but needed the sturdiness of the canvas, because after all...this is the mudroom.
So, I headed out to HD and picked up a drop cloth. A pretty big one. 6 foot by 9 foot.
This entire ensemble cost me $9.00. Excluding the high density foam that I already had for 6 years.
This is the look I was going for:
 |
| Restoration Hardware- originally $59 dollars. OUCH! |
 |
| And this. Also Restoration Hardware. |
And the overall feel- This:
 |
| Well... not as fancy. |
First up, the bench cushion. I removed the cover I had on them from before, I decided I needed to lighten things up.
 |
| The mudroom before picture- see the old cushion covered with stuff? |
 |
| Cover removed. |
Next, I hauled the foam up to my sewing room and found 4 pieces of scrap plywood to "stabilize" the foam, and have a place for the canvas to attach to. I did not feel like sewing this cover, I just wanted to keep it simple and wrap and staple it.
 |
| I spaced out the plywood and attached with hot glue. |
 |
| Hot glued then flipped over to attach. & My inquisitive son. |
 |
| Drop cloth. Nice! |

Next, I cut the drop cloth to the size of the foam, adding about 5- 6 inches around all sides to wrap and staple to the plywood.
 |
 |
| I continued the entire side, pulling and stapling. |
For the corners I folded neatly, and tightly making them more square than round, then stapled.

 |
| The entire cushion finished. Sorry, blurry picture. |
Next, for the decorating part. I decided to use painters tape (actually it was green frog tape) and make a striped design clear across the entire cushion.

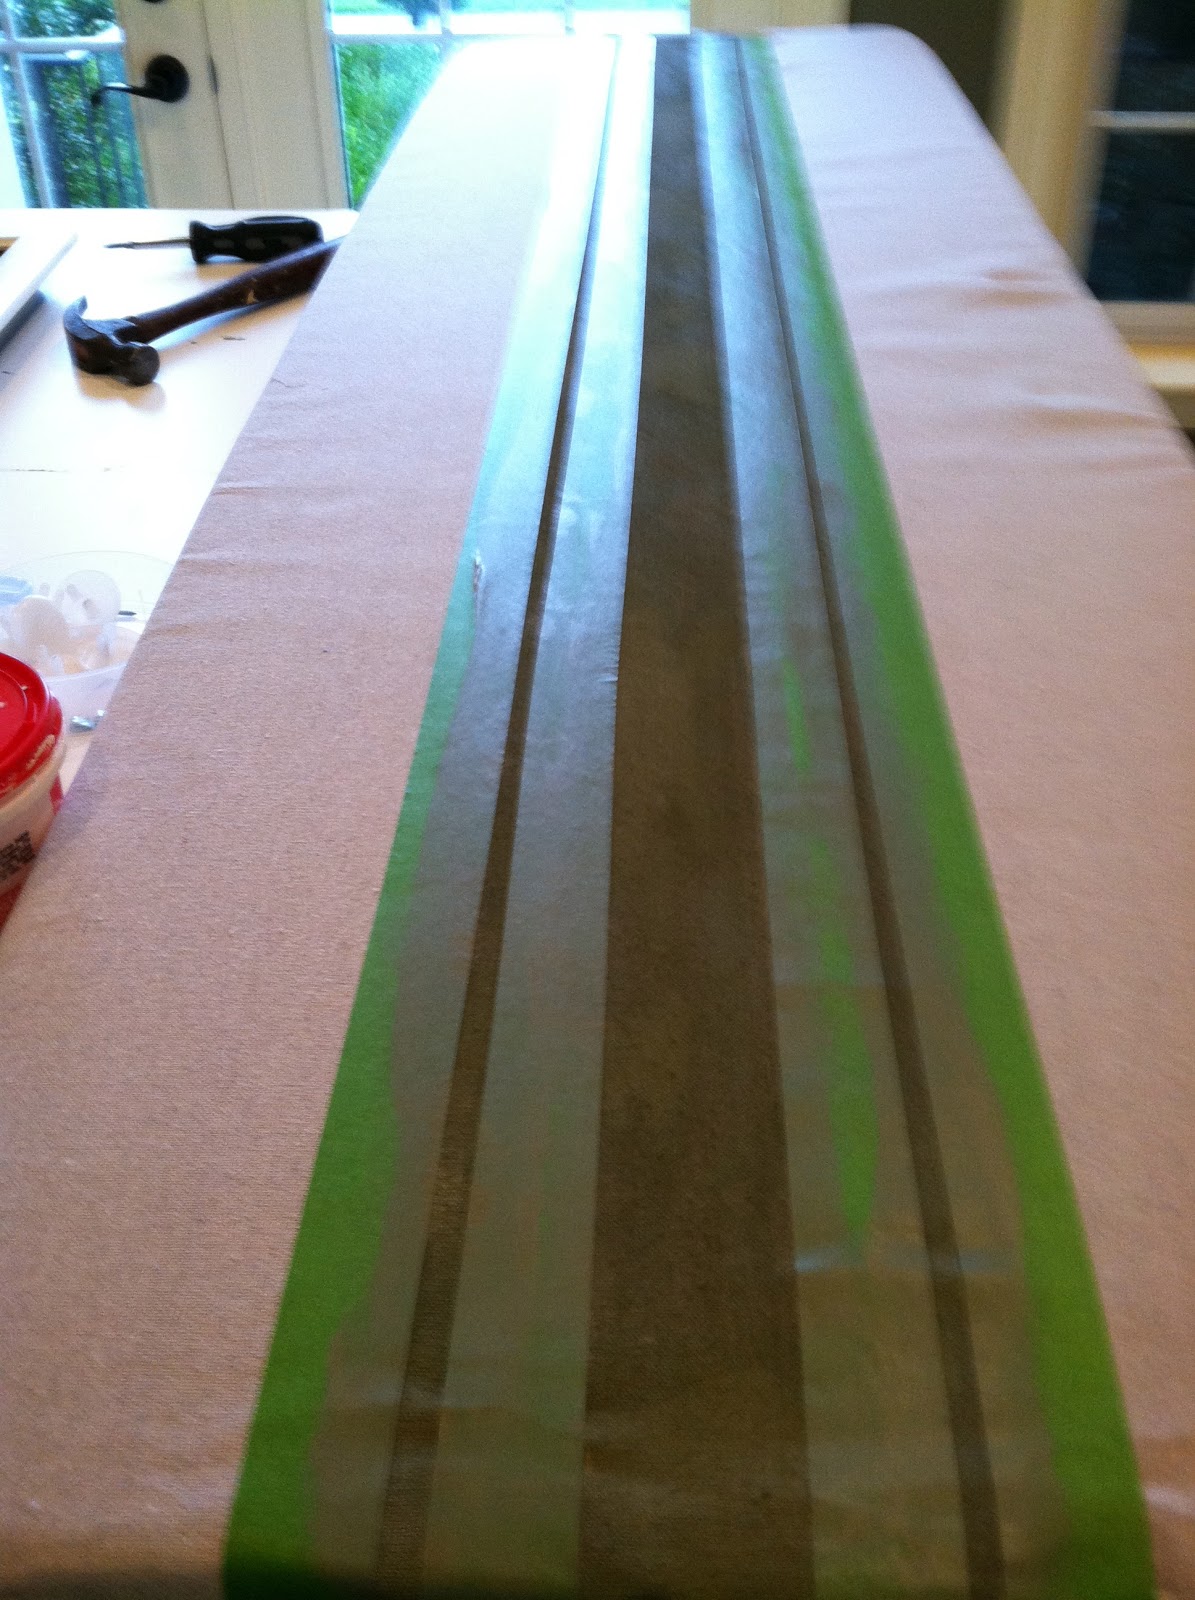 |
| Large middle stripe and two small stripes. |
I just used the same paint that I painted the walls, Its Benjamin Moore, Kingsport Grey, a Pottery barn sponsored color.
I used a sponge roller to spread the paint. It took only like 10 minutes to dry. Then I pulled off the tape.

It looks a little standard issue army-ish don't you think?
 |
| Back in place where it belongs, looking good. |
I made 4 pillows.
Three "flour sack" square pillows.
& one bigger pillow, more of a standard bed size pillow.
Again, I had PLENTY of leftover canvas from the cushion.
For the larger rectangular pillow-
Note**Part of the charm of these pillows is the exposed 2 side stitchings, so I did not need to hide the seams. The only seam that is turned inside out is the bottom seam in each of these pillows.
I cut one piece of canvas 33 inches wide x 38 inches long and folded in half, creating a rectangle 33 x 19.
 |
| Larger pillow |
Match your right sides together, and then straight stitch the one long side together, then flip right side out, and iron seam.
You should have two opened sides now. Fold in the edges about 1/2 inch and sew. Then, match and sew one side together, leave the other end of the pillowcase open.
You can see what I mean in the next pic.
 |
| See the right side at the very edge? You should have exposed seams. This one has white stitching. |
Then, tape your fabric, and paint with sponge roller. Once this has dried, you can fill the case with filling. I tore apart old ratty pillows and used the stuffing.
 |
| Sorry another bad pic. Open end. Fill it, then stitch it. |
Then sew the open end together to close the pillow. Again this is an outside straight stitch- you want the stitching exposed.
Now, for the square pillows.
I cut the canvas into one rectangle, size 24 inches long x 16 inches wide to make one 16 inch square sack pillow. I folded the rectangle in half and did the same as the steps above.

Then, I painted the pattern on the fabric. Filled the pillow then stitched closed. Remembering to expose the stitching on the two ends.
Next, the fun part. I wanted to personalize the pillows so, I painted initials on each square pillow. This was painfully simple.
Here is how I made the stencils:
I typed the letter in my word processing software, blew it up to like a 200 size, chose the right font then printed on my printer. Then (while watching one of the Real Housewives of insert city here) I used my eyebrow scissors, you know, tiny curved ones? And cut out the paper letters.
 |
| Letter stencil. |
Then, I roller painted the letter for each t, k and h.
Then, for a pop of color I painted a red heart on the middle bigger pillow with red fabric paint I had laying around.
I heart this project!
PS- I STILL had (have) canvas fabric left over! My new favorite fabric? Canvas!
Hope you do too.
Drop me a line, and LIKE us on Facebook.
Kristen
its a really very help full blog.
ReplyDeleteI love this. Brilliance! Trying this & the bench this week. LOVE! Thanks! Any other suggestions for cheap foam? Ike's is 2 hours away.
ReplyDeleteI have also used the foam cushion you know "egg crate" foam for beds from walmart. I buy a full or twin size I think it is less than 15 dollars for the egg crate foam. Have fun
DeleteThank you, Kristen! Kristin
ReplyDeleteI made them! http://krafty-k.blogspot.com/2013/02/drop-cloth-monogrammed-pillows.html
ReplyDeleteTHanks for the tutorial.
This comment has been removed by the author.
ReplyDeleteLooks great, I have canvas couches, so Im thinking about just painting them instead of going through the hassle of sewing a slipcover out of drop cloth. So my question is, where you painted on it, how does it feel? Do you think it would be alright for a whole area or do you think I should not be so lazy? :)
ReplyDeleteCheyenne~ You could paint the couches. That makes me nervous though, unless you have a very steady hand. I would be afraid of making a painting mistake and smudging the couch forever. Thats the beauty of the drop cloth- its cheap. I just felt the canvas where painted- there is maybe a 10% "scratchierness" to the fabric where it is painted. Not enough to be that noticeable....
DeleteDid you prewash your fabric before you made the pillow covers? I want to recover our camper cushions and they will need to be washed after some of the camping trips if needed. So wash before sew to avoid shrinkage? Thanks!
ReplyDelete1. Arrow for above image: Select canvas option while buying.
ReplyDeleteCheap custom canvas prints
Wow, this is fascinating reading. I am glad I found this and got to read it. Great job on this content. I liked it a lot. Thanks for the great and unique info. Goose down pillows
ReplyDeletePretty good post. I just stumbled upon your blog and wanted to say that I have really enjoyed reading your blog posts. Any way I'll be subscribing to your feed and I hope you post again soon. Big thanks for the useful info. https://archerytopic.com/best-hunting-jacket/
ReplyDeleteThe word organic makes itself clear that the stuff and fiber used in the pillows is of very high quality. Organic buckwheat is basically a type of wheat which is 100% natural and pure. best pillows india
ReplyDeleteGood idea thats really helpful and update resoiurces
ReplyDeleteI was diagnosed as HEPATITIS B carrier in 2013 with fibrosis of the
ReplyDeleteliver already present. I started on antiviral medications which
reduced the viral load initially. After a couple of years the virus
became resistant. I started on HEPATITIS B Herbal treatment from
ULTIMATE LIFE CLINIC (www.ultimatelifeclinic.com) in March, 2020. Their
treatment totally reversed the virus. I did another blood test after
the 6 months long treatment and tested negative to the virus. Amazing
treatment! This treatment is a breakthrough for all HBV carriers.
Great job.
ReplyDeleteMemory foam pillows can help with migraines by supporting proper neck alignment, reducing pressure points, and promoting restful sleep, which may alleviate migraine triggers.
ReplyDeletehttps://www.rinipo.com/
Nice articles and your information valuable and good articles thanks for the sharing information Square Memory Foam Cushion
ReplyDeleteNice articles and your information valuable and good articles thanks for the sharing information Lumbar Support Pillow
ReplyDelete